

Why Helm? - Introduction & Examples
How does helm manage packages and how do we make kubernetes deployments with it?


What's helm?
Simply googling or asking most people will give you a similar answer: Helm is a package manager for Kubernetes. Well, THAT'S HELPFUL...
Don't worry, just continue reading... I'll explain more.

How does helm "package manage"?
To make any normal deployment into a cluster, you kind of need 2 things:
The template - this is the configurations of the deployment and it includes things like the image name, whether you want more replicas, a static IP address, resources like RAM, storage, etc.
The values - these are the exact values you require. For the image, you can have different versions and the values contain the image version you want to deploy. If you need a static IP address, the values contain the actual IP address. It's like a
.envfile innit?
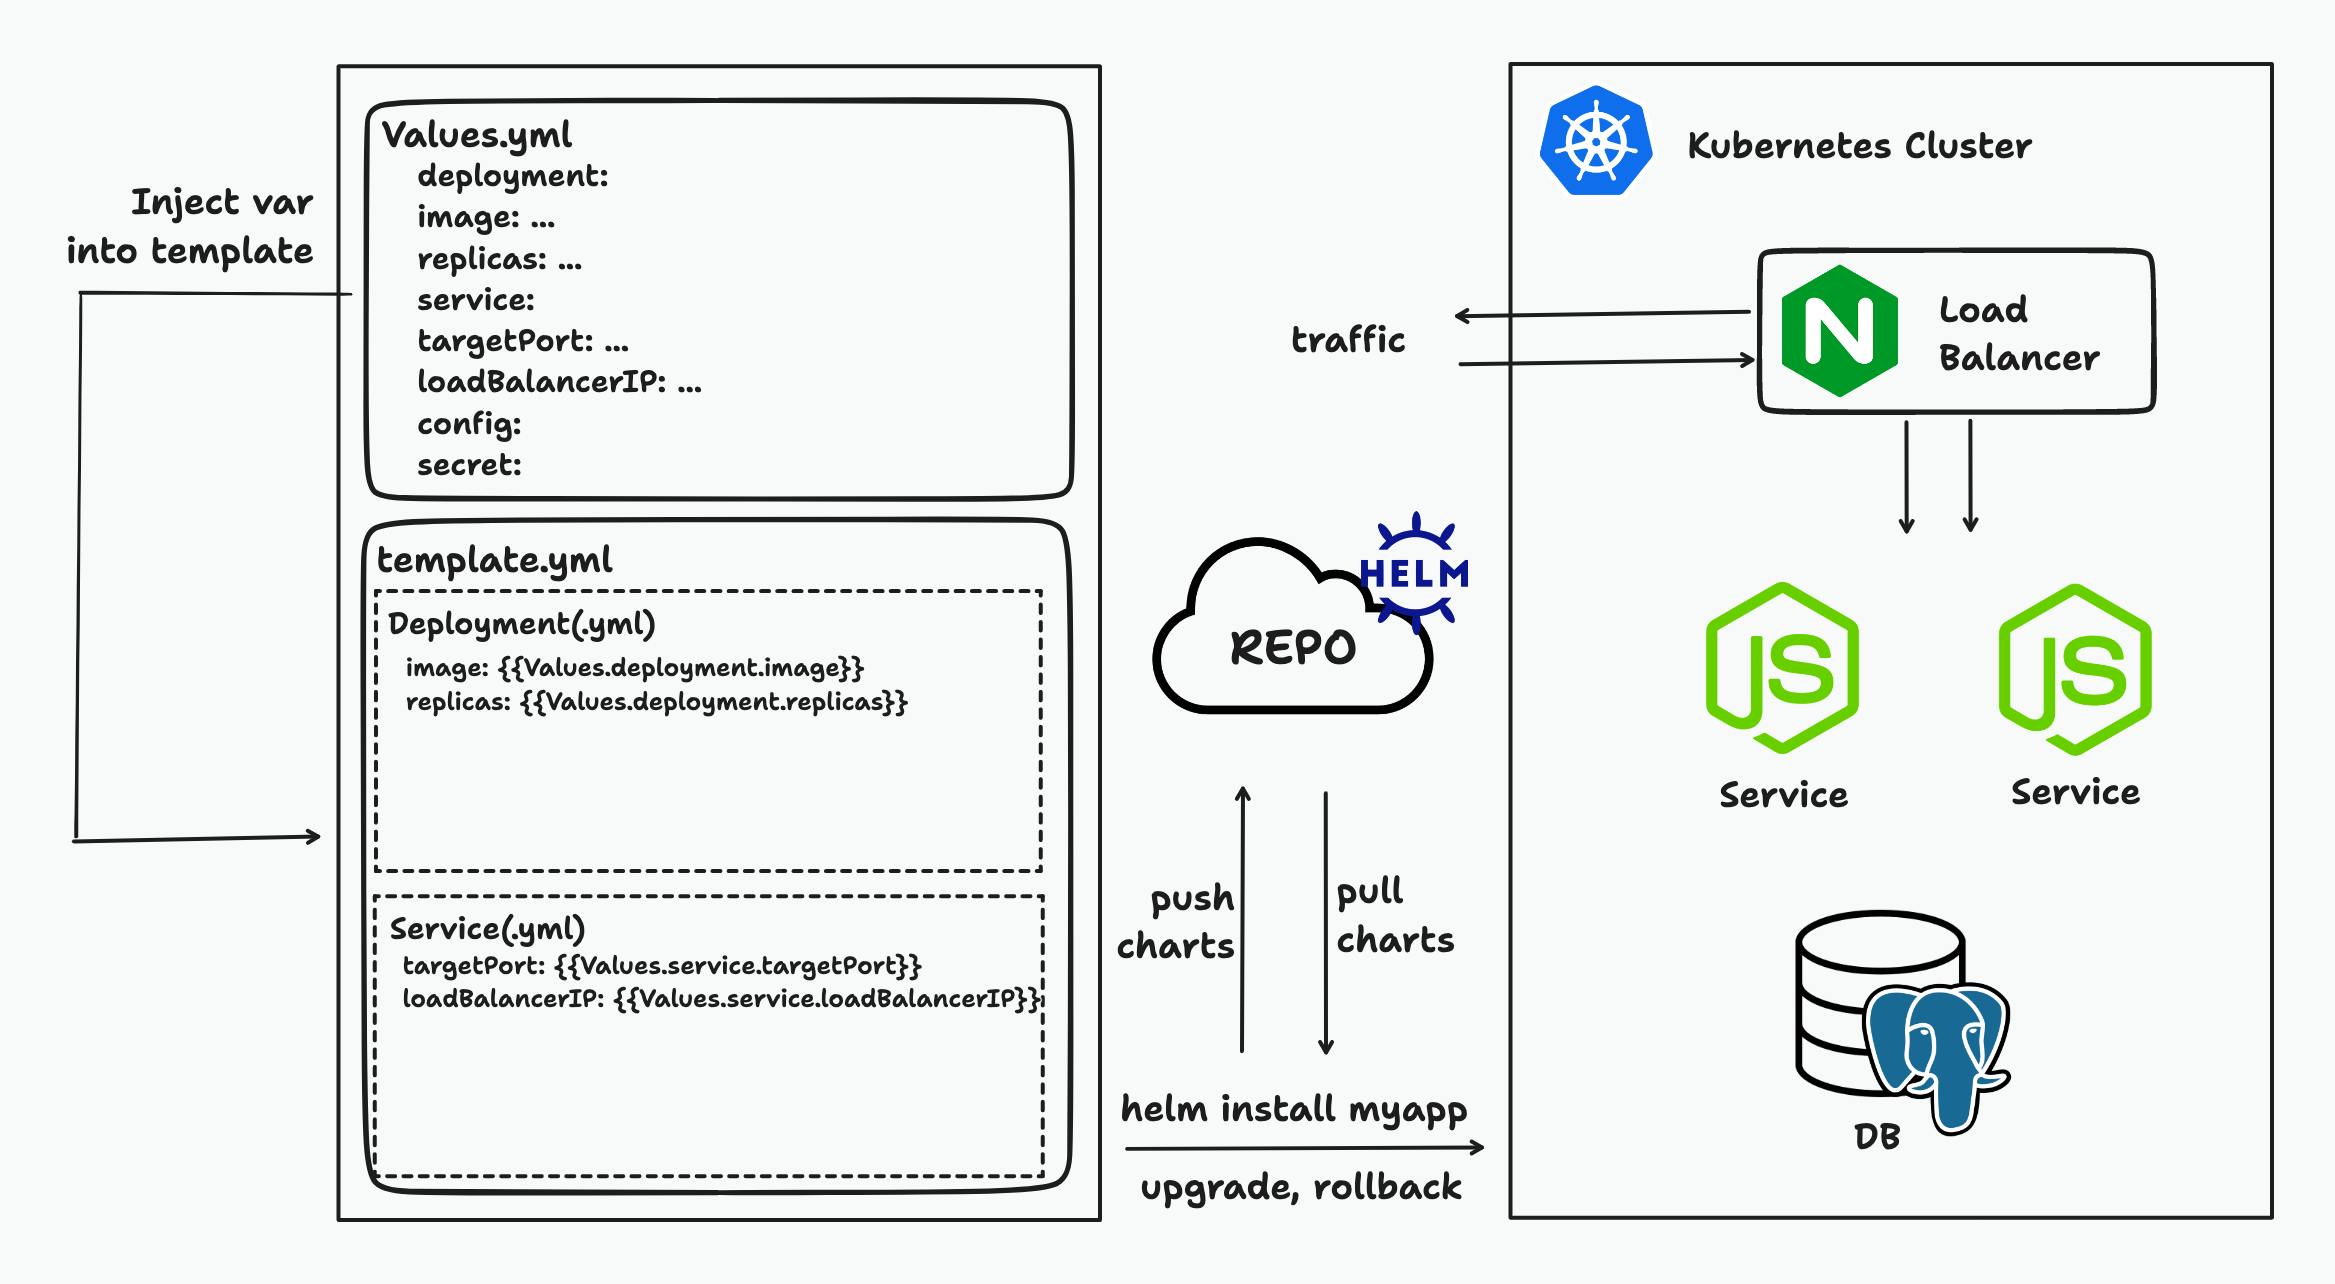
Helm simply automates the existing workflow. Referencing the image, helm works by taking the variables in a Values.yml file and injecting it into template(s) - depending since each service generally has 1 template. Then, helm packages the whole thing into a chart. We can now use the chart to make the server deployment by calling helm upgrade!
Earlier when people said that helm is a package manager, now it makes more sense right? Helm is a package manager because it packages our applications and services into charts. Charts are essentially the bundle of templates and values that helm can use to make the deployments. Also, we can share this chart easily with others via the Artifact Hub on the cloud (publicly or internally) just like how we can share npm packages or docker images!
A simple yet beautiful way to manage deployments in clusters with multiple people isn't it?
Cool Beans... But still, why use helm?
To truly appreciate helm, you probably need to understand manual deployment via kubectl. In short, every Kubernetes object is mainly maintained via YAML manifests. For example, to deploy a backend service for a CRUD application, you need to have a deployment.yaml and service.yaml for deploying the service (refer to this if you wanna know) and the corresponding ConfigMap and Secrets which holds your mounted files and environment variables as necessary. This can become increasingly complex and difficult to manage for a production application which has multiple services dependent on each other.

With helm, we simplify the maintenance of these YAML manifests and streamline the processes into a single command, making it easy to deploy or roll back versions and reduce possible configuration mistakes. A huge saviour in server deployment indeed!
Let's try it out!
Let's try deploying an nginx image based on this video:
First of all, we need to make sure we have both
kubectlandhelminstalled:brew install kubectl brew install helmThen in anywhere, let's create the chart directory called
test:helm create testAs said earlier before, you can see the
service.yamland thedeployment.yamlfile in the templates folder.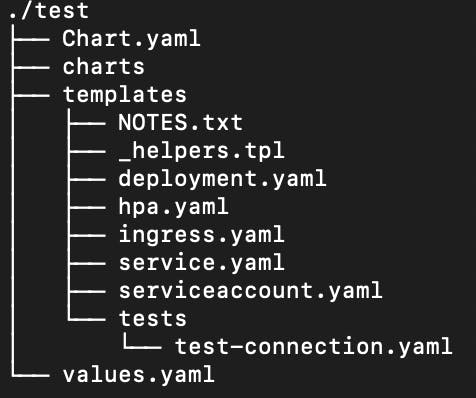
Let's change
service.yamlto use atargetPortvalue we specify:apiVersion: v1 kind: Service metadata: name: {{ include "test.fullname" . }} labels: {{- include "test.labels" . | nindent 4 }} spec: type: {{ .Values.service.type }} ports: - port: {{ .Values.service.port }} targetPort: {{ .Values.service.targetPort }} protocol: TCP name: http selector: {{- include "test.selectorLabels" . | nindent 4 }}Then, edit
values.yamlto include the following:image: repository: nginx pullPolicy: IfNotPresent # Overrides the image tag whose default is the chart appVersion. tag: latest service: type: ClusterIP port: 80 targetPort: 80Let's create a Kubernetes namespace called
dev. This will make it easier by grouping Kubernetes objects in a namespace.kubectl create namespace devNow, we just need to install the helm chart to the namespace
dev:#basic helm install #test if working helm install -f test/values.yaml -n dev test ./test --dry-run #make the installation helm install -f test/values.yaml -n dev test ./test #idempotent version #test if working helm upgrade --install -n dev -f test/values.yaml test ./test --dry-run #make the installation helm upgrade --install -n dev -f test/values.yaml test ./testYou should see an output like this:
 NAME: test
 LAST DEPLOYED: <time_of_deployment>
 NAMESPACE: dev
 STATUS: deployed
 REVISION: 1
 NOTES:
 1. Get the application URL by running these commands:
   export POD_NAME=$(kubectl get pods --namespace dev -l "app.kubernetes.io/name=test,app.kubernetes.io/instance=test" -o jsonpath="{.items[0].metadata.name}")
   export CONTAINER_PORT=$(kubectl get pod --namespace dev $POD_NAME -o jsonpath="{.spec.containers[0].ports[0].containerPort}")
   echo "Visit http://127.0.0.1:8080 to use your application"
   kubectl --namespace dev port-forward $POD_NAME 8080:$CONTAINER_PORT
Let's check if it has been successfully deployed:
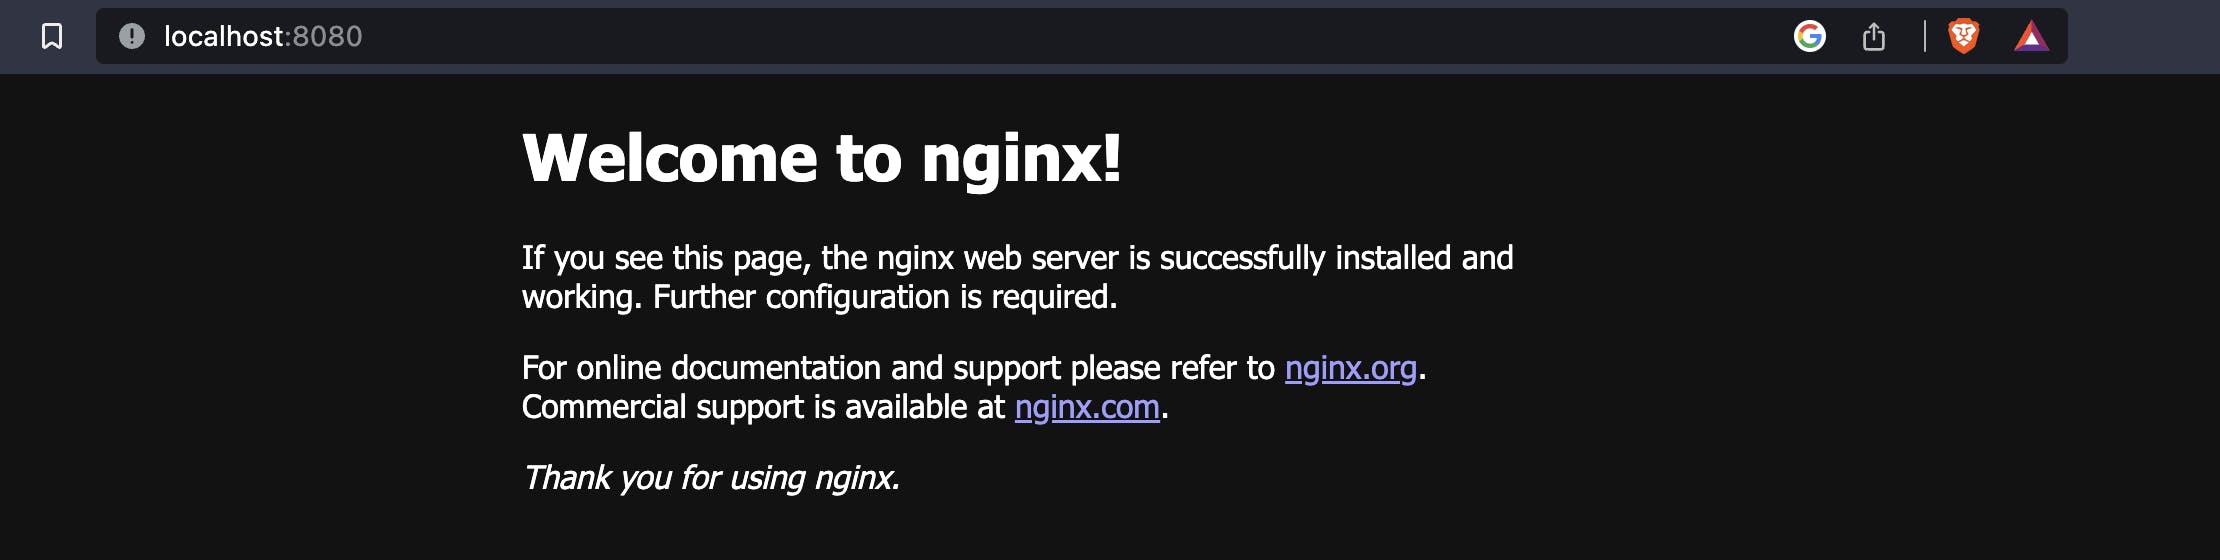
 helm ls -n dev
 kubectl get pods -n dev
 kubectl get services -n dev
Now, let's have a more visual confirmation by directly querying the nginx service. But to do so, we need to do a port forwarding of the service's port. Do note that it isn't recommended to do this in a production application.
Follow the instructions from the output when we ran
helm install:export POD_NAME=$(kubectl get pods --namespace dev -l "app.kubernetes.io/name=test,app.kubernetes.io/instance=test" -o jsonpath="{.items[0].metadata.name}") export CONTAINER_PORT=$(kubectl get pod --namespace dev $POD_NAME -o jsonpath="{.spec.containers[0].ports[0].containerPort}") kubectl -n dev port-forward $POD_NAME 8080:$CONTAINER_PORTYou should see something like this:
If we want to upgrade the existing deployment, we can run the following:
 helm upgrade --install <release name> --values <values file> <chart directory>

 #Test if it is working
 helm upgrade --install -n dev -f test/values.yaml test ./test --debug --dry-run

 #Make the upgrade
 helm upgrade --install -n dev -f test/values.yaml test ./test
This is idempotent as well, so it will install the chart if it doesn't exist!
Now we have no more use for this, so let's just delete the entire deployment:
helm uninstall -n dev test
Congrats you have successfully managed to use helm to deploy something on a Kubernetes Cluster! :)
Some food for thought...
We have done an extremely basic runthrough of very basic components in helm. Here are some stuff you can think about:
How do we "mount" files?
There are many ways to do this, one typical way is via a
ConfigMapyou can try taking a look at how to get files via$file.GetAnother hackish way is to put it in
values.yml
How do we store secrets?
Typically, it's stored as a
Secret, you might want to check out how to do so using the helm secrets pluginTry your best not to put it in values.yml or in a file that is conspicuous (especially if you're pushing it to a repo)
How do we rollback?
This is simple! Take a look at how to use
helm rollbackYou might wanna try out
helm get secretsand see that the versions of each release are stored as a secret and helm uses it to rollback.
That's all folks!
This is my first time writing something like this and never knew it was so difficult to write something that I would be satisfied with! (Would say that even this post has a long way to go)
Hope this helps whoever who is starting out and is trying to learn helm. As part of learning in public, any feedback would be great for both others and myself! You can contact me via Twitter as well!
References
Helm 3 Tutorial by Anton Putra